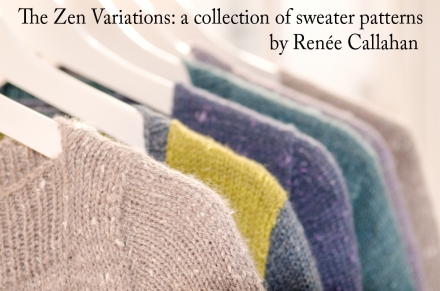
A new kind of sweater pattern

Hello!

Today I’d like to introduce the pattern I wrote for the Machine Knitting, Sweater Basics. I have to say that I was really pleased with this pattern, and I hope it will be useful for both hand and machine knitters.

Sweater Blank schematic

My idea was to create a worksheet that could lead a knitter through making a pattern based on a fabric of any gauge. I wanted it to be super clear and easy enough for even a beginner knitter to understand and work through. It was particularly important for me that it would be easy to customise.


Sweater Blank worksheet by Renee Callahan

Peek of the Sweater Blank Worksheet courtesy of Craftsy.com

Initial indications suggest that the pattern has been really successful for the people who have used it and I am so excited about seeing the finished projects–sometimes a very first project for the knitter (!) coming through.

I knit several versions of the sweater, modelled here by the lovely Craftsy model:

A Sweater Blank Sweater by Renee Callahan


A Sweater Blank Sweater by Renee Callahan

A Sweater Blank Sweater by Renee Callahan

Photos courtesy of Craftsy

I have started a Ravelry project page for the sweater and I really look forward to seeing the projects progress.

If you haven’t signed up, but are interested in learning more about machine knitting or getting the Sweater Blank OR you would just like a 25% discount on any Craftsy.com class, please have a look at  my website.

Happy knitting,

Rx

Zen Variations: the Sleeve

Hello!

Zen Variations Kaizen cardigan Knitting pattern by Renée Callahan-29

I think one of the challenges of working a set-in sleeve is that it isn’t obvious what is going on as it’s being worked, and one of the challenges of explaining the set-in sleeve is that the work is no longer flat, but 3-D, making the illustrating of the technique also less than obvious. Today I’ll attempt it anyway.

For a Zen Variations sweater, the Front and Back have been worked separately and then the body has been worked in the round, with stitches added on at the underarm (12). This leaves us with an empty armhole to fill with a sleeve as follows:

Diagram of sleeve on Zen Variations by Renée Callahan

13. Pick up Sleeve sts from around the armhole.
14. Knit across the flat of the sleeve head (A), and work the sleeve head with short rows: working back and forth between sides B and C; W&T each st along the armhole sides until the sts cast on for the underarm (12) are reached. Then work sleeve in the round to cuff.

For a different perspective on a similar fit, it may help to have a look at this diagram of a sweater by the Knitting Fiend, which is worked flat but may help to give a larger overview of how the elements are fitting together.

And that is it! The next step in working your Zen Variation sweater is to weave in ends, block it and wear it forevermore.

So, I would love to hear from you–what is your favourite sleeve? To knit and to wear, are they the same?

Happy knitting,

Rx

Constructing the Zen Variations

Hello!

I’m visiting the family in Seattle this week, but I am not neglecting the Zen Variations knit-along while I am away! As I mentioned in a previous post, my travel knitting is the Enso sweater, knit in Kettle Yarn Co. Islington DK.

It’s all the rage to knit seamless, top-down sweaters and it is a construction I really love for a few good reasons.

With top-down, you can try as you go, checking the fit at the crucial junctures, making the armhole deeper if you want to, or shorter, and of course making the sweater body and sleeves as long as you want them.

Today I want to begin a step by step tutorial for knitting a Zen Variation sweater, which starts with the upper back:

Zen Variations by Renée Callahan back

In this schematic, we are looking at the Back from the right side, and working from casting on at the top down to the underarm/bottom of the sleeve opening.

1. Cast on the number of stitches required for both shoulders and back neck (the red line).
2. Place markers (m) to mark shoulders.
3. Work short rows to create shoulder slope: knit across Right Shoulder and Back Neck to Left Shoulder, wrap and turn (W&T) the next st; purl back to Right Shoulder, W&T the next st; knit back to the 1st wrapped st, k3 (wrapped st + 2 more) W&T, purl back to 2nd wrapped st., k3 (wrapped st + 2 more), W&T, etc.
4. Work straight until the back armhole is as long as necessary.
5. Work increases (+) at the underarm edge until the full back measurement (minus the stitches that will be cast on for the underarm) is reached.
6. Put Back sts on waste yarn.

I will continue the tutorial with the Fronts in a couple of weeks.

If you are interested in learning more, I will be teaching a several workshops in and around London, and further afield, leading students through understanding the construction as well as all the techniques associated with the design (working the wrapped short-rows, picking up stitches for a beautiful set-in sleeve, a perfect finish for  your new sweater) as well as choosing the right size, making modifications, and more. I’m teaching Zen and Art of Sweater Construction in several places this Autumn:

25 September  the Village Haberdashery.

1 October I will have the whole Zen Variations collection at Wild and Woolly for a trunk show and little party to celebrate sweater season!

6 October Wild and Woolly

16 October A Yarn Story. 

Mon, Oct 24 to Fri, Oct 28 I will be in Romania teaching a number of knitting classes at the Taking a Moment in Time  Weaving, spinning, knitting and photography retreat.

12 November The Yarn Dispensary

For a more complete list of classes, including Brioche Stitch Basics among others, please sign up to the newsletter here.

Happy knitting,

Rx

It’s (almost) knitting season: Let’s knit together!

Hello!

Regardless of the temperature, September brings out the student in me, and I’m nostalgic for those crisp Autumn mornings at the beginning of the school year. This year, I’m embracing the nostalgia with a knit along to kick start the knitting and learning season. I’ll focus on the Zen Variations because although each sweater is quite simple and clean in terms of design, there are several techniques that might not be obvious to inexperienced sweater-knitters. I will make some tutorials and explanatory blog posts which I hope will encourage knitters to make sweaters they will wear forever.

Zen Variations Knitting pattern by Renée Callahan

The knit along will run from 1 September to 31 December in the EastLondonKnit Ravelry group. Cast on any EastLondonKnit design on 1st September and post a photo of the finished object in the thread before the 31st December (bonus points if it is modelled on a person:) and I will pick a number of winners in the early hours of 2017.

To sweeten the pot, I have put together a few fantastic prize packages to tempt you into joining the fun!

Llovely Llama prize from EastLondonKnitThe first prize is a Llovely Llama ‘un courtesy of Kettle Yarn Co. Linda who has generously gifted one of her popular LlamaLlamaLlamaLlama bags to the prize pot. I am pairing it with 3 gorgeous skeins of the Fibre Company’s Acadia yarn for some lucky soul… 

I have also organised A Very Tweedy Prize of a woollenflower notions bag with 3 matching skeins of Acadia by The Fibre Co., because everyone knows you should coordinate your notions bags and yarn…
EastLondonKnit tweed prize

My final offering is a Woodland Zen prize: a cute foxy notions pouch and three more skeins of yarn among other presents: a beautiful skein of Acadia, a hand-dyed beauty from Dirty Water Dye Works and a lovely, crunchy skein of indigo blue Skudde Wool from Natures Luxury.

EastLondonKnit prizes: woodland zen

I hope to see you in the EastLondonKnit Ravelry group for encouragement, help and a chance to win some wonderful prizes!

You can browse the Zen Variations and all the other EastLondonKnit patterns here.

Happy knitting!

Rx

All the learning

Hello!

I love teaching people new knitting techniques. It is one of the most rewarding things I do.

I also love learning new things and I’ve had some wonderful learning opportunties recently.

First of all, I was lucky enough to grab the last place at Karie Westermann’s Nordic Traditions workshop at Wild and Woolly. It was great, even though Karie totally skewered my ardent desire to learn all about ‘traditional’ knitting by explaining the way that tradition is often the recent invention of savvy knitwear marketers….

Nordic Traditions with Karie Westermann

And shortly after that, I got to attend the Squam Spring retreat, where I took a wonderful hap workshop with Gudrun Johnston and a photography/styling workshop with Helene Dujardin, which resulted in some excellent photographs of my new shawl design, Lakelet.

Lakelet by Renée Callahan

I was assisted by my beautiful classmate Michelle (modelling above), and Helene herself, who was kind enough to take the following 2 photos.

Lakelet knitting pattern by Renée Callahan

We practiced our styling (and posing!) with a design I have been wearing quite regularly now, Beetlebum:

Beetlebum by Renée Callahan


Classes and Events coming up

On the other side of the coin, I have been enjoying teaching in several new venues, particularly The Yarn Dispensary, where I will be teaching Next Steps Brioche July 9th.

I am really looking forward to teaching a workshop on Zen and Art of Sweater Construction at the Village Haberdashery 3rd July. There are still a couple of places left, so please do join me to learn the ins and outs of top-down seamless sweater construction.

Are you going to Fibre East 30-31 July? I will be there with Kettle Yarn Co. (as is my habit) and I would love to see you. If you are going, please do come by and say hello!

The last event of the summer for me is a trunk show at Purlescence 20 August. From Purlescence:

This time, we’ll be welcoming not one but two guests. Linda of KettleYarnCo will be bringing along a stunning selection of her hand-dyed yarns, and providing inspiration for the yarn will be Renee of EastLondonKnit.

As well of plenty of yarn and other knitterly goodies to browse, they’ll also be plenty of tea and cake  to enjoy while you catch up with some friends and settle down on the sofa with some knitting.

We’ll be open between 10 and 4 at our premises in Leckhampstead, just off the 4 near Newbury, and have plenty of free parking available.

Which takes us right up to knitting season!

Happy knitting,

Renée x

Free Pattern: The Brioche Twister

Hello!

Ever since Nancy Marchant published her amazing books on brioche stitch and I realised that I could hand-knit my favourite machine knitting stitch, I have been smitten. I have done several designs with the stitch including a stockinette brioche stitch in the Frost & Flame shawl, and 2-colour brioche rib trim in the Heritage Heart Jumper and Blackberries and Brioche hat.

And now I have another addition to the collection: Brioche Twister.

knitting pattern Brioche twister scarf by EastLondonKnit

The pattern is meant to be an educational one, so I’ve included intermediate techniques such as a tubular cast on, brioche increases and decreases and a sewn bind off, each with detailed instructions to guide you through.

Brioche Twister knitting pattern by Renée Callahan

And the best bit is that this pattern is available for free if you subscribe to my (new!) newsletter.

(Technical things are not my super skill and I can tell I was tested in setting up the newsletter. It is the type of thing that even an idiot can do, and yet… )

Anywho, I am really pleased to offer this pattern to my subscribers and I am excited to start the newsletter. I hope to be able to collect some fun things together every month for a little bit inbox joy for you!

So please do sign up for the newsletter here!

Happy knitting,

R.

Shortening Sleeves tutorial

Hello!

In this last post about the family cardigan, I thought you may enjoy seeing some sweater surgery. Cutting into knitwear is always a bit of a thrill, and it was necessary for Grandma’s cardigan. I knit the sleeves to my own length in her absence. I should have known better, as I am abnormally long monkey arms and an unconscious desire to knit all sleeves longer than they should be. That’s a theory for why my sleeves often come out out too long anyway.

Hand knit cardigan for GrandmaELK hand knit cardigan (1 of 1)-10

When we tried the cardigan on Grandma, the sleeves were much too long–more than 10 cm, so I marked the correct length with a safety pin and grabbed some scissors. I knit the cardigan bottom up, so ripping back the sleeves wasn’t an option.

ELK hand knit baby cardigan (1 of 1)-3

I cut it to the correct length, and then decided to graft the cuff I already knit back onto the sleeve.  The other solution would have been to pick up the stitches and knit a new cuff down.

ELK hand knit baby cardigan (1 of 1)-4

Beginning to work a cuff-length from the cut-off point, I began to graft the stitches from the cuff to the sleeve.
ELK hand knit baby cardigan (1 of 1)-5

I quickly realised 2 things; first, there were more stitches at this place on the sleeve, and they would have to be eased into the number of stitches on the cuff. Second, that it was easier to rip back to the point I wanted to graft from and work directly with the live stitches. After being blocked the stitches are well-set and the chance they will run/get lost is minimal.

ELK hand knit baby cardigan (1 of 1)-6

I grafted all the stitches, easing in the extra stitches evenly around the cuff.

ELK hand knit baby cardigan (1 of 1)-7

I kept the stitches loose until then end, and then tightened them up and I think it is a pretty smooth join.
ELK hand knit baby cardigan (1 of 1)-8

In the end, I think she was happy with it too. Or at least she did the nice thing and acted appreciative.

Grandma's hand knit cardigan

Happy knitting,

R.

Saguaro

Hello!

My closest local yarn store is Wild and Woolly, run by the lovely Anna. I met Anna some time before she opened the shop and it is probably because I have seen some of the hard work (angst, even?) that goes into opening a shop that I am really rooting for her to succeed.  So I was pretty excited when we started to chat about me designing a pattern in her latest addition to the shop–several gorgeous shades of Malabrigo Rios.

Knitting Yarn: Malabrigo Rios

What I wanted to design was a cowl that worked with two colours, one of which was an especially beautiful variegated yarn.  I always find these yarns very appealing in the skein, but when it comes time to knitting it up, I was never quite sure what to do with it. So I designed something to show off the colourwork, giving each yarn it’s own space to shine, but remains simple and enjoyable to knit.

I have worked 2-colour cables before with the Duelling Cables headband, and the technique is ohh so satisfying. There is just something flashy about 2-colour cables, a tiny bit of showing off, but in a nice, knitty way. The result was Saguaro–named for the distinctive cactus the cables resemble.

Cosy Saguaro Hat and Cowl

The hat and cowl combination together use exactly 2 skeins of Malabrigo Rios.  Each begins and ends with striped ribbing and then goes on to the Saguaro cable pattern.

Saguaro Hat by Renée Callahan

The Rios is a lovely, bouncy Merino with intense colour and a joy to work with. The variegated Candombe colourway was really interesting-it continually evolves, changing to incorporate more yellow, then more purple, then browny-green hues.

Saguaro Hat and Cowl by Renée Callahan 1

To celebrate this lovely yarn and my new pattern, we are having knit-along at Wild and Woolly Ravelry group starting 16th March and ending 6th April. For anyone in the London area, I will be teaching a class on the 2-colour cabling technique Wednesday 18 March at Wild and Woolly, from 6:30-8:30 pm.  It would be great if you could join us! Please contact the shop to reserve a space.

The Saguaro pattern is available for download here!

Happy knitting,

R.

Rhombolution

Hello!

November’s pattern is a double-knit scarf I called Rhombolution!  The exclamation mark isn’t really part of the scarf’s name, but seemed appropriate.

Rhombolution  by EastLondonKnit (2)

I am loving the double-knitting at the moment.  It is such a nice way to do colour work without having to worry about the tension issues of stranded knitting.  And it just kinda feels clever.  Working 2 versions of the same pattern at once seems a little bit magic.

Rhombolution by EastLondonKnit 4


My biggest super-duper thanks to my beautiful model Linda, the wonderful indie yarn dyer of Kettle Yarn Co. yarns. I used her gorgeous Waltham yarn for the scarf, which was a pleasure to work with. For our photo shoot I went down to visit Linda at her new seaside location, and we amused the locals by artfully posing the lovely lady and scarf around all manner of picturesque scenery.


Rhombolution by EastLondonKnit(1)

We got this one just before the owner of the property tried to hit us with her car.

I designed Rhombolution with a 2 -colour tubular cast on and bind off, and a slipped stitch edging, but of course these elements could be left out if the knitter wanted to make the knitting as simple as possible.  I figure it’s better to put in more and let people take out what they don’t want.  Of course, I could be wrong about that–perhaps it’s better to include the most simple set of instructions.  Then the more experienced knitters could change things to suit themselves and the less-experienced knitters wouldn’t be intimidated.  Dear Reader: what do you think?  Do you have strong opinions on this subject?  I would love to hear them if so!

Rhombolution is available here for download on Ravelry, and comes with ‘How to Double Knit’ phototutorial.

Happy knitting!

R.

Great Balls of Hallowismas

Hello!

This month I was so close!  The pattern is written, knit up, tech edited and almost ready to go.  The thing is, I going to spend Halloween with the lovely Kettle Yarn Co., and October’s pattern is knit in her gorgeous yarn. I really can’t resist taking knits and camera along for a little photo shoot. It would be rude not to.

But I really couldn’t stand the fact that I am so close to actually achieving a New years resolution.  A whole year of doing what I resolved to on in those first hazy days of the year.  Only 3 months to go.  And even if I was just a couple of days late and could have overlooked the discrepancy since I am the only one keeping track, I guess I really wanted the prize for ridiculous adherence to the letter of a law I made up.  So here it is it, my pattern for Christmas in October!

ELK Christmas Eve Bauble

Christmas Eve Baubles

Christmas Eve Bauble

The Christmas Eve Bauble is a lovely and quick knit, perfect for using up scraps of 4-ply yarn.  I have listed the yarns used, but any will 4 ply or light DK/heavy fingering yarn will work beautifully. EDIT: I have found out that Rowan had discontinued yet another yarn I have in my stash. I knit up another bauble in scrapes of sock yarn and it works out just fine! Knitable in an evening (or even the night before), these baubles will deck the halls with cosy, handmade style.

MATERIALS

YARN

4 ply/fingering approx; 175 yds/160 m per 50 g ball)

MC: (light grey) 8 g.
CC1 (dark grey) 2 g.
CC2 (blue) 1 g.
CC3 (red) 2 g.

NEEDLES

US #2/2.75 mm double-pointed needles/circulars or size needed to obtain gauge.

NOTIONS

1 Christmas bauble, tapestry needle, 1 stitch marker.

GAUGE

6 sts and 8 rows = 1 inch/2.54 cm in stranded St st stretched over bauble.

SIZE

10 3/8 inches/26.5 cm bauble circumference

BAUBLE PATTERN

CAST ON

With MC, cast on 8 sts.  Arrange sts on dpns or circular needle to join in the rnd.  Keep the cast on loose enough to accommodate the hanging attachment. PM to mark beginning of rnd.

INCREASE

Rnd 1: (K1, m1*) around. (16 sts)
Rnd 2 and all even rounds: Knit around.
Rnd 3: K1, m1, (k2, m1) to last stitch, k1. (24 sts)
Rnd 5: K1, m1 (k3, m1) to last 2 sts, k2. (32 sts)
Rnd 7: K1, m1, (k4, m1) to last 3 sts, k3. (40 sts)
Rnd 9: K1, m1, (k5, m1) to last 4 sts, k4. (48 sts)
Rnd 11: K1, m1, (k6, m1) to last 5 sts, k5. (56 sts)
Rnd 13: K1, m1, (k7,m1) to last 6 sts, k6. (64 sts)
Rnd 14: Knit around.

CHART

EastLondonKnit Christmas Eve Bauble ChartWork 8 repeats of chart once through row 1-11.

DECREASE

Rnd 1 and all odd rounds: Knit around.
Rnd 2: K1, (ssk, k6) to last 5 sts, k5. (56 sts)
Rnd 4: K1, (ssk, k5) to last 4 sts, k4. (48 sts)
Rnd 6: K1, (ssk, k4) to last 3 sts, k3. (40 sts)
Rnd 8: K1, (ssk, k3) to last 2 sts, k2. (32 sts)
Rnd 10: K1, (ssk, k2) to last stitch, k1. (24 sts)
Insert the ball into the knitting.
Rnd 12: (K1, ssk) around. (16 sts)
Rnd 13: Ssk around. (8 sts)

E.L.K. Christmas Eve Bauble below

FINISHING

Thread the tail through a tapestry needle and draw through the remaining sts twice. Secure top tail to make a hanging loop or weave in end.

E.L.K. Christmas Eve Bauble with lights

At least I know I won’t be last minute with my November pattern! (Or will I?! It is so too early to start with the panto, I know…)

*I use a backward loop cast on as a m1–please see the abbreviations page if that isn’t a familiar one for you.

Happy knitting,

R.